Thermostat Not Working? A Step-by-Step Troubleshooting Guide
That sinking feeling when your home is suddenly too hot or too cold is often followed by a bigger worry: an expensive repair bill. But when you discover your thermostat not working, what to do first isn’t to panic. Many common issues have surprisingly simple solutions that don’t require a service call, and you don’t need to be an expert to check them safely. Before you assume the worst, a few quick checks can often restore your comfort and peace of mind.
We’ve created this straightforward, step-by-step guide to give you the confidence to troubleshoot the problem yourself. We’ll walk you through a reassuring checklist-free of technical jargon-to help you diagnose and potentially fix the issue in minutes. By following these simple steps, you can get your heating or cooling working again quickly and understand the problem before you ever need to pick up the phone. And if you do need professional help, you’ll know you’ve covered all the bases first.
Key Takeaways
- Start your troubleshooting with the easiest fixes first, as many thermostat issues can be resolved in under five minutes by checking batteries and basic settings.
- If the thermostat itself seems fine, the problem may be the power supply; our guide shows you how to safely check your circuit breaker and HVAC unit switches.
- Learn to solve common smart thermostat problems, which are often related to Wi-Fi connectivity or app settings rather than the HVAC system itself.
- When your thermostat not working what to do involves complex wiring, it is essential for your safety to stop and contact a certified HVAC professional for reliable service.
First Steps: 5-Minute Checks for Your Thermostat
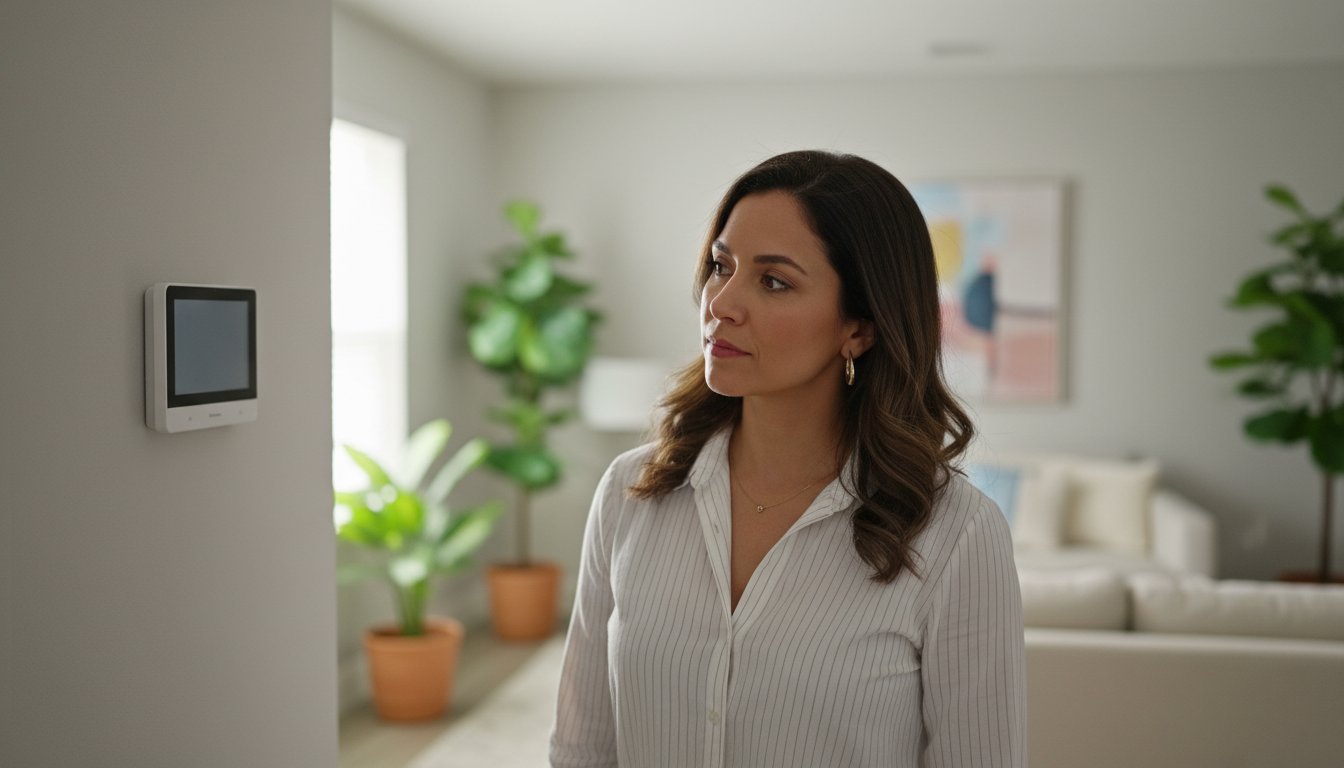
When your heating or cooling system suddenly stops, it’s easy to assume the worst. But before you worry about a major HVAC failure, it’s important to know that the thermostat itself is often the source of the issue. If you’re wondering about your thermostat not working what to do, the answer is to start with these simple, 5-minute checks. They require no special tools and can often solve the problem quickly, restoring comfort to your home. These reliable first steps will help you determine if the problem is a simple fix or something that requires professional attention. Even if they don’t solve it, this information will help our certified experts diagnose the issue faster if you need to call for service.
Check 1: The Thermostat Display and Power
Is the thermostat display completely blank? A dead screen is one of the most common signs of a simple power issue. Most modern digital thermostats rely on batteries for power. Locate the battery compartment-it may be on the side, bottom, or you may need to gently pull the faceplate off the wall mount. Replace the old batteries with a fresh, new set and see if the display comes back to life. If you have a hardwired thermostat and the screen is blank, this points to an issue with your home’s electrical system, which we will cover in the next section.
Check 2: System Settings and Mode
Sometimes, the fix is as simple as a wrong setting. Your thermostat is the command center for your HVAC system, and incorrect instructions will prevent it from running. Before assuming it’s broken, take a moment to confirm its basic settings. Understanding what is a thermostat and how it functions as a control device can help clarify why these settings are so critical. Double-check the following:
- System Mode: Ensure the thermostat is set to either ‘Heat’ or ‘Cool’-not ‘Off’. If using ‘Auto’, make sure your temperature settings are correct for the season.
- Temperature Setting: For cooling, the set temperature must be lower than the current room temperature. For heating, it must be set higher.
- Hold Function: Check if a ‘Hold’ or ‘Vacation’ mode is active. This feature overrides your regular schedule and could be keeping the system off.
Intermediate Troubleshooting: Beyond the Thermostat Itself
If you’ve confirmed your thermostat’s basic settings are correct but the unit remains unresponsive, the problem may not be with the thermostat at all. When your thermostat is not working, what to do next is to safely check the power supply to your entire HVAC system. Don’t worry-this is a very common scenario, and the fix is often quick and simple. These steps are straightforward and can often solve the issue without the need for a service call. Always prioritize your safety when inspecting any electrical components.
Check 3: Inspect Your Home’s Circuit Breaker
A tripped circuit breaker is a frequent and easily fixed cause for a non-responsive HVAC system. Breakers are safety devices that automatically shut off power during an overload or short circuit to protect your equipment. A sudden power surge or an overworked system can cause a trip. Here’s how to check and reset it safely:
- Locate the Panel: Find your main electrical panel, which is typically in a garage, basement, or utility closet.
- Identify the Breaker: Look for a breaker clearly labeled “HVAC,” “AC,” “Furnace,” or “Air Handler.”
- Reset the Breaker: If the switch is in the middle or “Off” position, it has tripped. To properly reset it, you must first push the switch firmly to the full “Off” position, then flip it back to the “On” position.
Check 4: Find the HVAC Unit’s Power Switch
Your indoor furnace or air handler has its own dedicated power switch, separate from the circuit breaker. This switch often looks just like a standard light switch and is usually mounted on the side of the unit or on a nearby wall. Because of its appearance, it can easily be mistaken for a light switch and accidentally turned off. Take a moment to locate this switch and confirm it is flipped to the “On” position.
Check 5: Clean Your Thermostat
Over time, dust and debris can accumulate inside your thermostat, interfering with its delicate internal sensors and causing inaccurate temperature readings or preventing it from turning on. The internal components of a thermostat are sensitive, as detailed in the comprehensive U.S. Department of Energy thermostat guide, and even a small amount of buildup can cause problems. To clean it safely, gently pop off the thermostat cover. Use a soft brush or a can of compressed air to carefully clear away any visible dust from the internal workings.
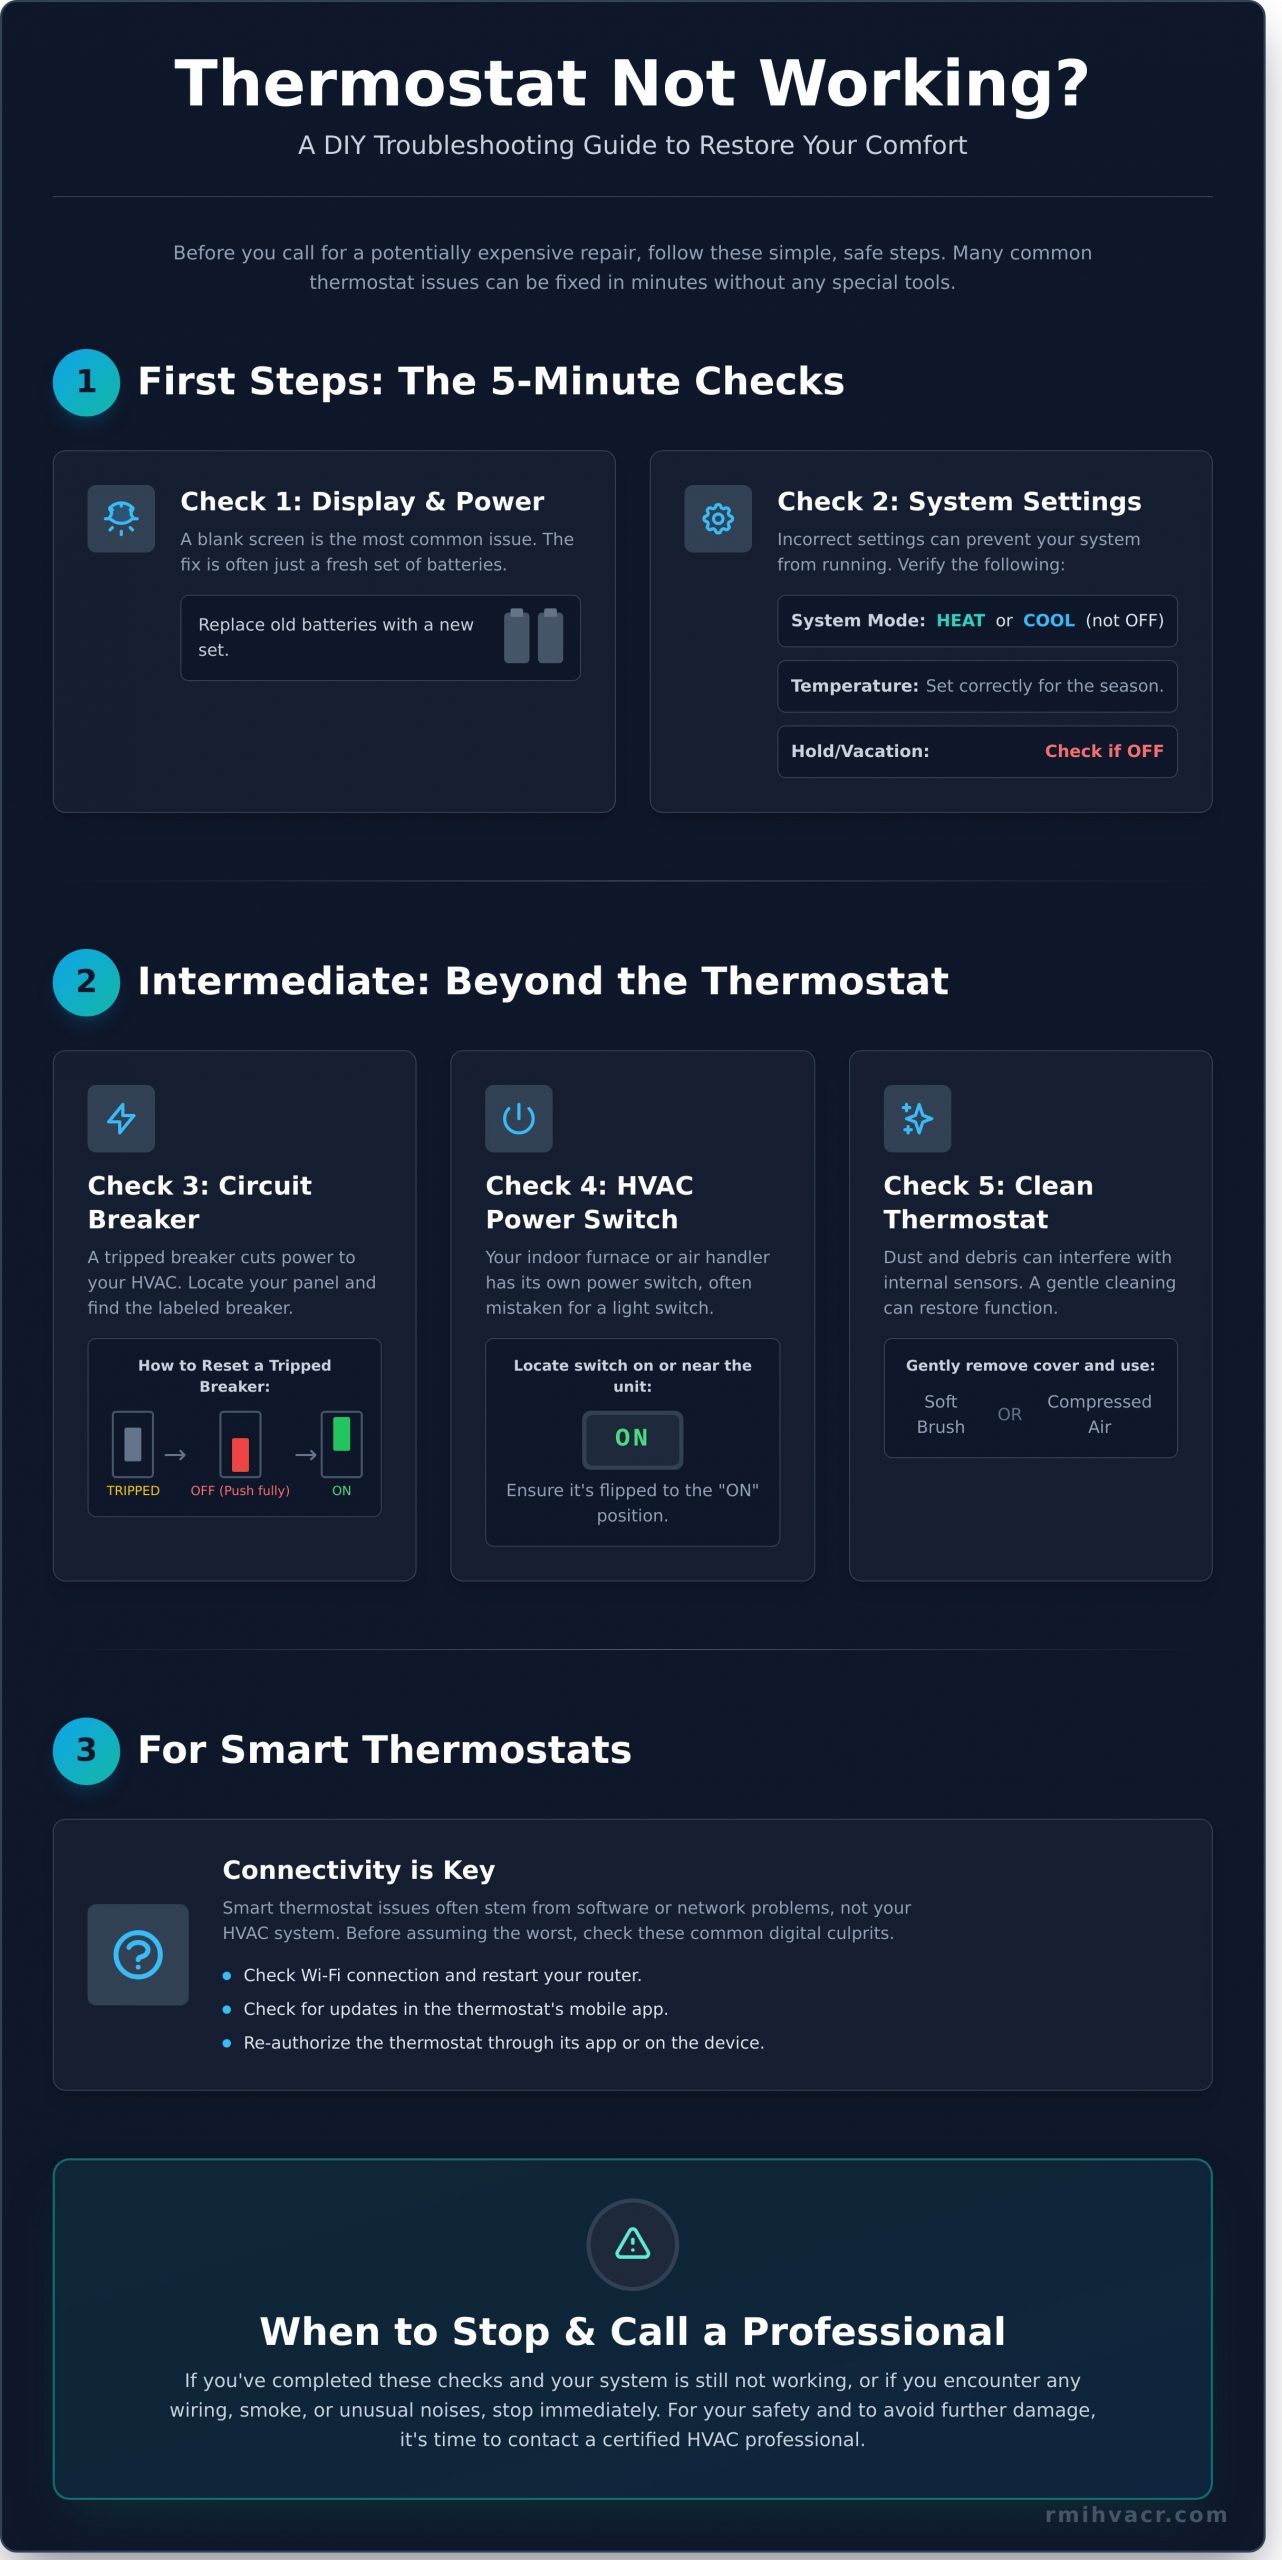
Solving Common Smart Thermostat Problems
Smart thermostats offer incredible convenience and efficiency, but their reliance on technology introduces a new set of potential issues. The good news is that when your smart thermostat not working what to do often involves simple digital troubleshooting rather than a complex HVAC repair. Many problems, such as being unable to control your system from your phone, can be solved quickly without calling a technician. Always start by checking your manufacturer’s app for specific error codes or notifications that can point you in the right direction.
Troubleshooting Wi-Fi and Connectivity
The most common culprit behind a malfunctioning smart thermostat is a lost connection to your home’s Wi-Fi network. If your thermostat appears offline in its app or is unresponsive to remote commands, your first step should be to check its internet connection. A reliable connection is essential for the thermostat to function as designed. Try these simple, effective steps:
- Check for recent changes: Have you changed your Wi-Fi password, network name (SSID), or installed a new router recently? If so, your thermostat needs to be updated with the new credentials.
- Perform a reboot: A classic IT solution often works here. First, reboot your home’s internet router. Once it is fully back online, restart your thermostat. This can often re-establish a lost connection.
- Follow manufacturer instructions: If a reboot doesn’t work, consult your thermostat’s user manual or the manufacturer’s website for specific instructions on how to reconnect it to your Wi-Fi network.
Verifying Schedules and App Settings
Sometimes, the thermostat is working perfectly, but its programming is causing it to behave in unexpected ways. A conflicting schedule or an overlooked setting can easily make it seem like the unit is broken. Before assuming a system failure, open the mobile app and carefully review its settings. For instance, following the Department of Energy thermostat guidelines on proper scheduling can prevent conflicts. Look specifically for ‘vacation,’ ‘hold,’ or ‘away’ modes that may be active, as these settings are designed to override your normal schedule to save energy while you’re gone.
If you’ve tried these solutions and are still facing issues, the problem may be more complex. When digital troubleshooting doesn’t solve the problem, you can count on the certified experts at rmihvacr.com to deliver a reliable diagnosis and efficient repair. Your comfort is always our first priority.
When to Stop Troubleshooting and Call a Professional
While DIY troubleshooting can solve many common thermostat issues, knowing when to stop is crucial for your safety and the health of your HVAC system. Attempting to fix complex wiring or internal components without certified training is not only dangerous but can also lead to more expensive damage. If you’ve tried the basic steps and are still asking, “my thermostat is not working, what to do next?” the answer is to call a trusted expert.
A professional diagnosis can save you significant time and money in the long run by correctly identifying the root cause and preventing a minor issue from turning into a complete system failure.
Clear Signs You Need an Expert
For your safety, immediately stop what you are doing and contact a certified HVAC technician if you notice any of these warning signs:
- The circuit breaker trips repeatedly. If you reset the breaker and it immediately trips again, this indicates a serious electrical fault that needs professional attention.
- You hear buzzing or humming sounds. Unusual noises from the thermostat or your HVAC unit often point to an electrical problem or a failing component.
- You smell burning plastic or electrical odors. A burning smell is a clear sign of overheating wires or parts and poses a serious fire risk.
- The thermostat shows a persistent error code. If you can’t clear an error code by following the manual’s instructions, it’s signaling a deeper system malfunction.
Why a Professional Call is Your Best Next Step
A certified technician has the specialized diagnostic tools to safely test electrical connections, voltage, and system components without risk. What appears to be a faulty thermostat could actually be a symptom of a more serious issue with your furnace or air conditioner, such as a clogged drain line or a failing safety switch. An expert can distinguish between a simple thermostat replacement and a larger system repair.
At RMI, our experienced technicians are trained to deliver reliable solutions efficiently. Our service vehicles arrive as fully stocked trucks, equipped with the most common parts and tools needed to fix the problem on the very first visit, saving you time and restoring your comfort quickly.
Don’t guess. Get a fast, professional diagnosis from RMI. Your comfort and safety are our top priorities.
Regain Control of Your Home Comfort
Knowing the answer to ‘my thermostat not working what to do‘ often starts with the simple fixes, like checking the batteries or resetting a circuit breaker. This guide is designed to empower you to solve those common issues confidently. However, it’s just as crucial to recognize when the problem lies deeper within your furnace or air conditioner. Continuing to troubleshoot complex electrical or mechanical issues can be risky, which is why knowing your limits is the smartest move you can make for your system’s health.
When you’ve done all you can, the RMI team is ready to step in. If you’ve tried these steps and still need help, schedule a trusted repair with RMI. As a Trusted HVAC Service Since 1999, we have built a reputation for reliable solutions and customer satisfaction. Our expert technicians are always prepared, arriving with Fully Stocked Trucks for Fast, Efficient Service to get the job done right the first time. And because problems don’t wait for business hours, we offer 24/7 Emergency Repairs Available when you need us most.
Don’t let a faulty thermostat disrupt your life. You’ve taken the first steps-now let our team deliver the comfort you can count on.
Frequently Asked Questions
How do I know if the problem is my thermostat or the HVAC unit itself?
A good first step is to check the thermostat’s display. If it’s blank or unresponsive, the issue likely starts there. Try replacing the batteries. If the display works but the system doesn’t respond, the problem could be with the wiring or the HVAC unit itself. For a definitive test, a certified technician can safely bypass the thermostat to see if the system powers on, isolating the problem quickly and reliably.
How much does it typically cost to have a thermostat replaced by a professional?
The cost for professional thermostat replacement typically ranges from $150 to $500, depending on the model you choose and labor rates. A basic digital thermostat is on the lower end, while a smart, Wi-Fi-enabled model will be more expensive. This cost includes the new unit and the expert installation by a certified technician, ensuring it’s wired correctly and calibrated to your system for optimal efficiency and performance.
Can I replace my home thermostat myself?
While some homeowners with electrical experience can replace a simple thermostat, it can be complex. You must ensure the new unit is compatible with your HVAC system and handle low-voltage wiring correctly. Mistakes can lead to short circuits or damage to your furnace or AC unit, resulting in more expensive repairs. For guaranteed safety and proper function, we recommend having a certified expert handle the installation.
What are the most common reasons for a thermostat’s screen to go blank?
If your thermostat screen is blank, the most common cause is dead batteries. Start by replacing them. If that doesn’t work, check your home’s circuit breaker to see if it has been tripped. Another possibility is a tripped safety switch on your HVAC unit, which is often caused by a clogged drain line or an overheating furnace. This situation requires a professional inspection to ensure your system is safe to operate.
How long do most thermostats last before they need to be replaced?
A modern digital thermostat typically has a reliable lifespan of about 10 to 12 years. Older, mechanical-style thermostats may last longer but are far less accurate and efficient. You might consider a replacement sooner if you notice issues like inaccurate temperature readings, frequent cycling, or a complete loss of power. Upgrading can also improve your system’s efficiency and lower energy bills, providing a clear return on investment.
My thermostat is clicking, but my AC or heater won’t turn on. What does that mean?
A clicking sound is a good sign-it means the thermostat is sending the signal to turn on. If the system doesn’t start, this is a classic ‘thermostat not working what to do’ scenario where the problem is likely with the HVAC unit itself. Common culprits include a tripped breaker for the furnace or AC, a faulty control board, or a failed motor. A certified technician can safely inspect these components and perform the necessary repairs.