Pilot Light Out? A Step-by-Step Guide to Safely Relight Your Furnace
That sudden chill in your home when the heat should be kicking on is an unwelcome and stressful surprise. You check the thermostat, but the silence from your furnace tells the real story, leaving you to face the cold and the worry of a potential repair bill. Before you reach for the phone, it’s important to know that the issue is often a simple one. In many cases, the problem is just a pilot light out-a fix that you can safely handle yourself without needing an emergency service call.
This guide was created to give you confidence and control. We will walk you through the exact steps to safely inspect and relight your pilot light, getting your heat back on quickly. We’ll also show you the clear warning signs that indicate a more serious issue, so you know precisely when it’s time to trust the job to a certified expert. Let’s restore the warmth to your home, safely and reliably.
What Is a Pilot Light and Does Your Furnace Even Have One?
When your furnace stops producing heat, one of the first culprits homeowners suspect is an extinguished pilot light. Dealing with a potential pilot light out can be frustrating, but before you troubleshoot, it’s essential to understand its function. To get a reliable overview, it helps to first answer the basic question: What is a pilot light? In simple terms, it is a small, continuous gas flame that serves one primary purpose: to ignite the main burners in your furnace when the thermostat calls for heat. This constant flame ensures that your system can provide heat reliably and on demand.
However, it’s crucial to know that this technology is no longer standard in all heating systems. Many modern, high-efficiency furnaces do not have a standing pilot light at all. Identifying your system type is the first step toward a quick and accurate fix.
Standing Pilot Lights vs. Electronic Ignitions
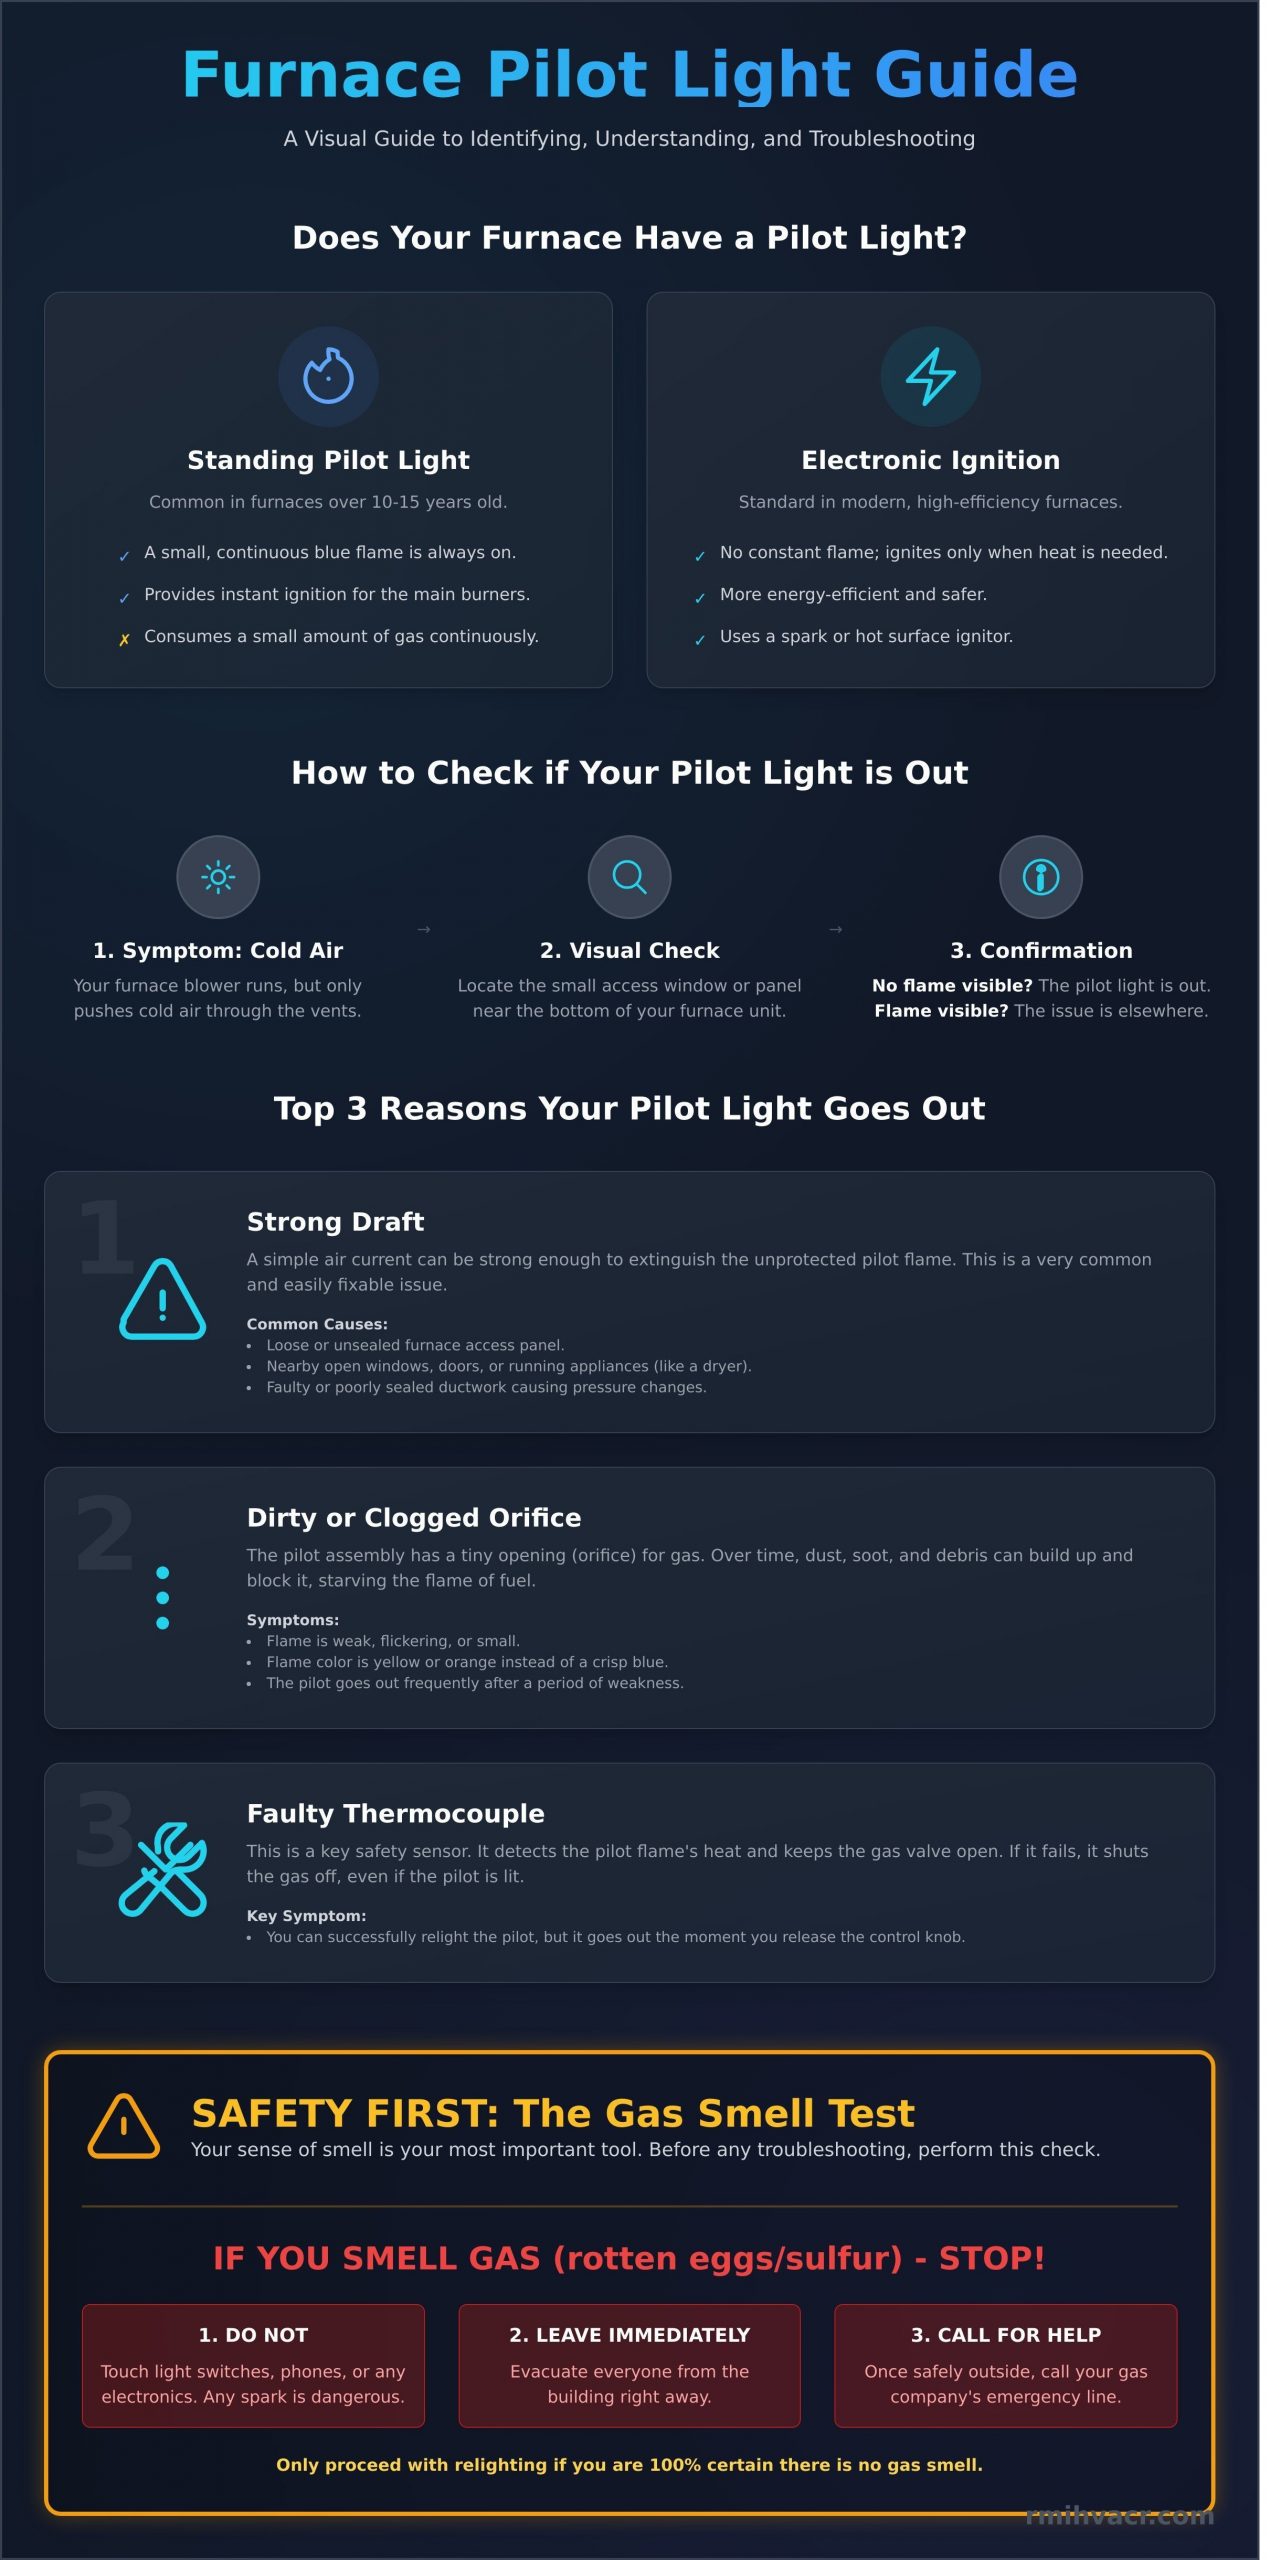
A standing pilot light is the traditional system, common in furnaces that are more than 10 to 15 years old. You can identify it by a small, constant blue flame that should be visible through an access panel on your furnace. While reliable, this system consumes a small amount of gas continuously, even when the furnace isn’t actively heating your home.
In contrast, modern furnaces typically use an electronic ignition. These systems are more energy-efficient because they don’t require a constant flame. Instead, they create a spark (intermittent pilot) or use a hot surface ignitor to light the main burners only when needed. If you don’t see a constant flame, your furnace likely has one of these more efficient, modern systems.
How to Check if Your Pilot Light is Out
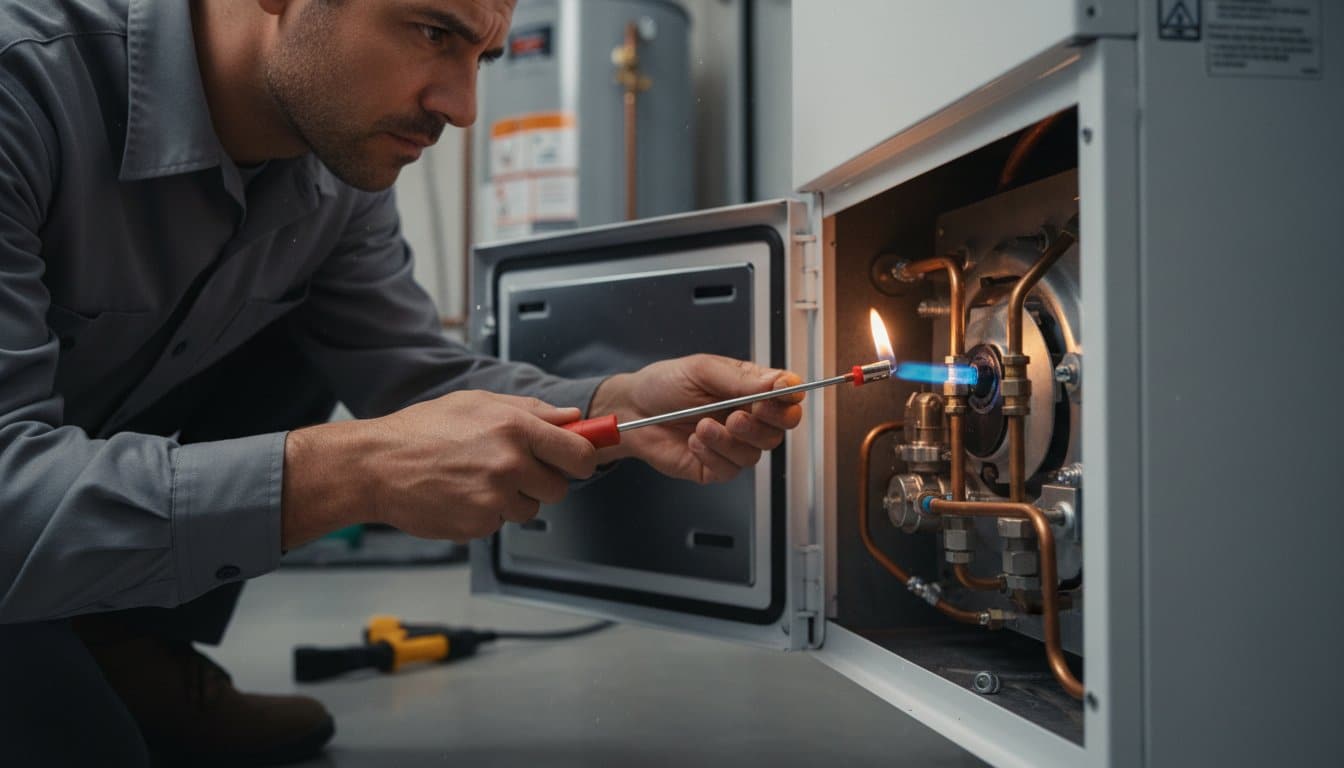
The most obvious sign of an issue is when your furnace blower turns on but only pushes cold air through your vents. This indicates the burners are not igniting. If you have an older furnace, a visual check is the next step to confirm if your pilot light is out. Here’s how to do it safely:
- Locate the small access window or panel on the front of your furnace unit, near the bottom.
- Look carefully through the opening for a small, steady blue flame. It is usually located at the end of a small gas tube.
- If you see the flame, your pilot light is working correctly, and the problem lies elsewhere.
- If you do not see a flame, your pilot light has been extinguished.
Remember, an absence of a flame only confirms a problem if your system actually uses a standing pilot. If you’re unsure, check your furnace’s manual or contact a certified HVAC expert for a dependable diagnosis.
Top 3 Reasons Your Pilot Light Goes Out
A pilot light that keeps extinguishing is more than an inconvenience-it’s a clear signal from your furnace or water heater. Understanding the root cause is the first step toward a reliable, long-term fix and helps prevent the issue from happening again. While many causes are simple, a recurring pilot light out problem can sometimes point to a more significant issue needing an expert eye. By diagnosing the most common problems first, you can efficiently identify the solution.
A Strong Draft
Sometimes, the simplest explanation is the right one. A strong air current can be enough to extinguish the small, steady flame of a pilot light. This is a frequent issue because the flame is unprotected. This draft can be caused by several factors:
- An open window or door located too close to the appliance.
- Poorly sealed or faulty ductwork creating air pressure changes.
- Even a clothes dryer running in the same small room can create a significant draft.
A quick and easy check is to ensure your furnace’s front access panel is closed and securely fastened. A loose panel can disrupt airflow and blow out the flame.
Dirty or Clogged Orifice
The pilot light assembly includes a tiny component called an orifice, which is the opening where gas is released to create the flame. Over months and years of operation, dust, soot, and other small debris can build up and clog this opening. When the orifice is partially blocked, it starves the flame of the fuel it needs to burn steadily. You might notice the flame becoming weak, flickering, or turning yellow instead of a crisp blue before it eventually goes out completely.
Faulty Thermocouple
One of the most common points of failure, especially in older systems, is the thermocouple. This is a crucial safety sensor positioned directly in the pilot flame. Its job is to detect heat and signal the gas valve to stay open. If the pilot light goes out, the thermocouple cools down and automatically shuts off the gas supply, preventing a dangerous leak. However, if the thermocouple itself fails, it can no longer sense the flame’s heat correctly. It will then mistakenly shut off the gas supply even when the pilot is burning perfectly. This safety component is fundamental to all modern furnace safety standards. If you can relight the pilot but it won’t stay lit after you release the control knob, a faulty thermocouple is the most likely culprit.
Safety First: Before You Try to Relight Your Pilot
Working with natural gas requires your full attention and caution. Before you attempt to fix a pilot light out issue, completing a few non-negotiable safety checks is the most important step. Your safety is always the top priority. While there are several common reasons your pilot light goes out, from a faulty thermocouple to a simple draft, they all involve a fuel source that must be handled correctly. Never skip these steps, even if you have relit a pilot light before. Following these rules is the only way to prevent a minor inconvenience from turning into a dangerous gas leak.
The Gas Smell Test: Your Most Important Tool
Your sense of smell is your first and most reliable line of defense. Natural gas is odorless, so utility companies add a substance called mercaptan, which gives it a distinct smell like sulfur or rotten eggs. If you detect this odor, STOP everything you are doing immediately. Do not touch any light switches, unplug appliances, or use your phone. Any spark could be dangerous. Leave the building right away, and once you are safely outside, call your gas company’s emergency line. Only proceed with the next steps if you are 100% certain there is no gas smell.
Prepare Your Workspace for a Safe Fix
Once you’ve confirmed the area is free of gas odor, properly preparing your workspace ensures a safe and efficient process. Taking a few moments to get organized protects both you and your property. Before you begin, follow this simple checklist:
- Read the Instructions: Your furnace, water heater, or fireplace will have specific relighting instructions printed on a panel directly on the unit. Read them thoroughly first.
- Clear the Area: Remove any flammable materials, such as paint cans, cleaning supplies, paper, or laundry, from the immediate vicinity of the appliance.
- Get a Flashlight: The pilot light is often in a dark, hard-to-see area. Use a bright flashlight for illumination. Never use a match or lighter for light.
- Turn Off the Thermostat: Set your thermostat to the lowest possible setting or “Off.” This prevents the furnace from trying to ignite while you are working on it.
With these safety checks complete, you can confidently and securely move on to the next step: relighting the pilot.
How to Safely Relight Your Pilot Light: A Step-by-Step Guide
Dealing with a furnace when the pilot light is out can seem daunting, but it’s a manageable task for many homeowners. This guide provides a general process that works for most older gas furnaces. However, your safety is the absolute priority. Always begin by reading the specific instructions on the manufacturer’s label attached to your furnace unit. Follow these steps precisely. If you feel unsure at any point or the pilot light won’t stay lit, it’s a sign you need expert help. For reliable and safe service, you can always contact a certified Roberts Mechanical Incorporated technician.
Step 1-2: Locate the Gas Valve and Turn It Off
First, you must ensure all gas flow is stopped. Locate the gas valve control knob on your furnace’s gas valve assembly, typically found near the gas inlet. This knob will have three settings: ‘ON,’ ‘OFF,’ and ‘PILOT.’ Firmly push in and turn the knob to the ‘OFF’ position. This is the most critical safety step. Wait at least 5-10 minutes to allow any lingering gas in the system to dissipate completely before you proceed.
Step 3-4: Set to ‘PILOT’ and Light the Flame
Once the area is clear of gas, you can prepare to light the flame. Turn the control knob from ‘OFF’ to the ‘PILOT’ setting. Press and hold the knob down (some models may have a separate red button). This action starts the flow of a small amount of gas to the pilot orifice. While continuing to hold the button down, use a long-handled lighter or a match on a holder to bring a flame to the pilot light opening. The pilot should ignite immediately.
Step 5-6: Keep Holding, Release, and Turn to ‘ON’
After the pilot flame ignites, do not release the button immediately. Continue holding it down for a full 30-60 seconds. This heats up the thermocouple, a safety device that shuts off the gas if the flame goes out. After a minute, slowly release the button.
- If the pilot flame stays lit, you have been successful. You can now turn the control knob from ‘PILOT’ to the ‘ON’ position. You should hear a distinct click as the main gas valve opens.
- If the pilot flame goes out, wait another 10 minutes for the gas to clear and repeat the previous steps. If it still won’t stay lit after a few attempts, you likely have a faulty part that requires professional diagnosis.
Finally, turn up your thermostat to call for heat and confirm your furnace kicks on. A steady blue flame is the sign of a job well done.
Pilot Light Won’t Stay Lit? When to Call a Professional
While relighting a pilot light is often a straightforward task, a flame that repeatedly goes out is a clear warning sign. This indicates an underlying issue that requires more than a simple fix. Attempting advanced repairs on gas appliances without professional training can be extremely dangerous. If you’re dealing with a persistent pilot light out problem, it’s time to stop troubleshooting and call a certified technician for a safe, reliable solution.
Building a reliable network of trade professionals is one of the best things a homeowner can do for their peace of mind. While this guide focuses on your furnace, the same logic applies to other complex systems in your home, like your plumbing. If you’re compiling a list of trusted experts for future needs, you can discover Division One Plumbing to handle any plumbing challenges.
Recognizing the signs of a deeper problem is key to keeping your home and family safe. Here are the most common issues that demand an expert’s attention.
Signs of a Failing Thermocouple
The most frequent reason a pilot light won’t stay lit is a faulty thermocouple. This is a critical safety sensor that shuts off the gas supply if it doesn’t detect a flame. The classic symptom is a pilot that lights while you hold the control knob down but extinguishes the moment you release it. While this part is essential for safety, replacing it is a quick and efficient job for a trained professional. Our experts can replace your thermocouple today.
A Weak or Yellow Flame
Pay close attention to the flame itself. A healthy pilot light should be a steady, crisp blue color with a strong tip. If you see a weak, flickering, or yellow flame, it’s a sign of incomplete combustion. This can be caused by a dirty gas orifice or an improper air-to-fuel mixture. A yellow flame not only creates soot but, more importantly, can increase the risk of carbon monoxide production. This requires professional cleaning and precise adjustment to ensure safe operation.
You’re Unsure or Uncomfortable
Your safety is the absolute priority. If you encounter any of the following situations, stop immediately and call for professional service:
- You smell gas at any point. Evacuate the area and call your gas company and an HVAC professional from a safe location.
- The instructions on your appliance differ greatly from standard procedures, and you’re not sure how to proceed.
- You feel uncertain or uncomfortable with any step of the process.
A service call fee is a small price for your peace of mind and well-being. Don’t take chances with gas appliances. Trust our certified experts for safe heating repair.
Stay Warm with Confidence: Your Next Steps
Facing a pilot light out situation can be stressful, but with this guide, you’re now equipped to handle it safely. Remember the most critical takeaways: always prioritize safety by checking for gas smells before you begin, and understand that knowing when to call a professional is as important as the relighting process itself. While a simple relight can often solve the problem, a persistent issue points to a deeper concern that requires an expert’s attention.
If your pilot light refuses to stay lit, it’s time to call for backup you can count on. RMI has provided trusted HVAC services since 1999, and our certified experts are always ready to help. With 24/7 emergency heating repair and fully stocked trucks, we can diagnose and fix the problem quickly and efficiently. If your pilot light won’t stay lit, call the trusted experts at RMI for 24/7 service.
Don’t let a furnace problem leave you in the cold. Your comfort and safety are our top priorities, and we’re here to ensure your home stays warm all winter long.
Frequently Asked Questions About Pilot Lights
What should a healthy pilot light flame look like?
A healthy pilot light should be a strong, steady flame that is mostly blue with a small yellow or orange tip. It should be about one to two inches high and completely envelop the tip of the thermocouple sensor. If the flame is weak, flickering, lifting off the orifice, or mostly yellow, it indicates a problem that needs attention from a certified technician. This ensures your furnace is operating efficiently and safely.
Is it dangerous if my pilot light goes out?
Generally, having your pilot light out is not immediately dangerous. Modern furnaces have a safety device called a thermocouple that automatically shuts off the gas supply when the flame is extinguished, preventing a gas leak. The primary issue is the loss of heat. However, if you ever smell natural gas (a rotten egg odor), you should evacuate the area immediately and call your gas company from a safe location.
Why is my pilot light flame yellow instead of blue?
A yellow pilot flame is a warning sign. It indicates incomplete combustion, which is typically caused by dirt or debris clogging the pilot orifice and restricting airflow. This condition is not only inefficient but can also produce harmful carbon monoxide. For your safety, a yellow flame should be addressed immediately by a professional HVAC expert who can safely clean the assembly and restore proper function to your system.
How can I tell if my furnace’s thermocouple is bad?
The most common symptom of a failing thermocouple is a pilot light that will not stay lit. You may be able to light the pilot, but it extinguishes as soon as you release the gas control knob. This happens because the thermocouple is no longer sensing the flame’s heat and is shutting off the gas as a safety precaution. This is a reliable sign that the part needs to be tested and likely replaced by an expert.
Should I turn my furnace’s pilot light off during the summer?
Turning the pilot light off in the summer can save a small amount on your energy bill. However, leaving it on can help prevent moisture, insects, and debris from accumulating in the pilot assembly, which can sometimes cause issues when you try to relight it in the fall. The choice is up to you, but if you do turn it off, we recommend scheduling a professional tune-up before the heating season begins to ensure reliable performance.
How much does it cost for a professional to fix a pilot light issue?
The cost varies depending on the specific problem. A simple cleaning or adjustment during a routine service call is the most affordable solution. If a component like the thermocouple or gas valve has failed, the cost will include the part and labor, typically ranging from $150 to over $350. Our certified technicians always provide a clear, upfront estimate before beginning any repair, so you can count on transparent pricing.